Image

Frozen Peg Dolls

securedownload

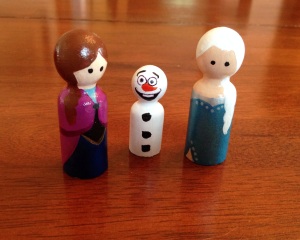
I recently became enamored with these wooden peg dolls after Frances told me about them. And after my daughter’s latest Frozen obsession, I knew I had to make Anna and Elsa. There is rarely a day that goes by without “let it go!” ringing through our house so these dolls have been a welcome addition to her creative play. I even made a set for my sweet niece’s birthday! What’s amazing is that these dolls fit with many of the dollhouse furniture we already have and they were so inexpensive to make! I pulled out my old acrylic paint from storage, found the perfect paintbrushes from my grandfather’s collection, and put a layer of mod podge over the top! I couldn’t have been happier. The Olaf doll was more of an afterthought but isn’t he cute? 🙂

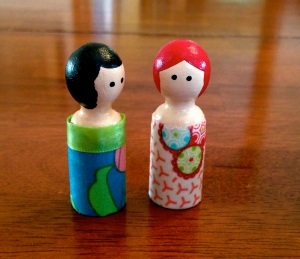
After Anna and Elsa were done, I finally finished the peg dolls that inspired the others. Although I think lace ribbon would been better than the green, but overall I’m very pleased with how these ladies turned out!

securedownload2

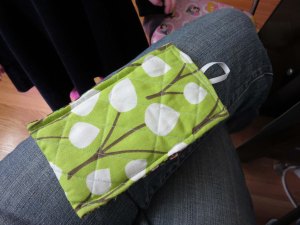
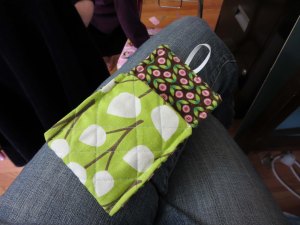
Camera pouch

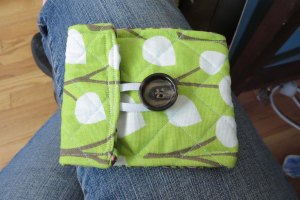
Ha! I finally finished something! A bag for my new camera!

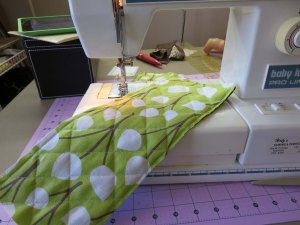
camerabag4I found the tutorial here at Scattered Thoughts of a Crafty Mom and found it very helpful. I haven’t quilted anything before, and even though this was a small, small experience, I have to say that I didn’t like the tracing lines or snipping countless threads at the beginnings and ends of stitch lines. (Mom–as an impatient person, how do you do it?)

stitched together incorrectly

stitched together incorrectly

I only had to rip stitches once! However, they were along three sides of the project, so it took awhile. I tried to remember all the advice I’ve heard for beginning seamstresses, about accepting that ripping seams and fixing mistakes is as much a part of the process as sewing or ironing. And I could have done more seam ripping if I wasn’t so impatient (see the end with the elastic that I sewed twice, once quite wonky). I just wanted to be done! Here are photos of the pouch without the giant button (for you, Mom):

camerabag3camerabag2My hoarding tendencies paid off big with this project: I didn’t have to buy anything for it! I already had everything, including a giant button that had come with an Ann Taylor maternity sweater years ago. I didn’t have the elastic cord she used in the tutorial, so I just used some thinnish elastic band I already had. The outside material is something I’ve been saving for years, and the inside material is from Big Girl Bee’s apron. And then I used extra fleece for the batting in-between layers. Yippee!

Notes for next time: I’m going to add 1.5 in. to the length, because although I added about half an inch this time, it wasn’t long enough for some breathing room. It’s probably related to the fact that I used thicker fabrics than the tutorial recommended (a corduroy and a home decor/duck-type fabric). Bulky. Definitely put my machine to the test.

Evie slept most of the time while Juni worked on her own project in the craft room with me. I gave her the scraps of my fabric and she would put them together on her own and ask me to stitch them together at certain places, which I would do on the sewing machine in between my steps. I don’t think she ended up with anything specific, but she seemed to be aiming at a bib for her baby doll. It was a great way to work together. Daddy ended up bringing both girls to the park as I was finishing up, and I put the button on this morning. It’s perfect! Now we can carry the camera around without damaging it.

camerabag4

Apron!

I finished something! I made my beautiful niece, Baby Bee, a little apron for Christmas, and I’m going to post about it before getting perfect pictures taken. That way I’ll actually post about it!

apronI used a free pattern from Sew Liberated that you can download here. The photos are here when you scroll down to “Basic Child’s Apron.”

The creator of this pattern was a Montessori teacher and developed this apron for the kids in her class. It’s meant to be able to be put on by the child him/herself. There is an elastic neckstrap for this purpose, as well as a non-tie waistband (you pull it around from one side to the other and secure with velcro). I thought Bee would love this, even though she’s younger (at 2) than the youngest ages mentioned for the apron (3-5).

I made her the smaller size and was concerned that it would be too big, but it seems to fit her just right, maybe just a teeny bit big. Whew!

And the pattern was easy to follow. I’ll definitely be making it again. I used cordoroy this time but I’d like to find a sturdier fabric for the next one. I just wanted something soft for Bee, something she’d want to wear that would be easy to wash. (And Mom–yes, there are buttons as part of the print. Hee, hee).

I love sewing for my family!


Upcoming Projects

It’s officially COLD. I woke up this morning to a frigid 28 degrees. That means, it’s time to knit! 🙂 I seem to only want to knit when I can bundle up in my blankets on the couch and watch a movie. Such a comfort.

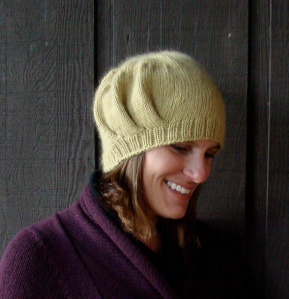
I wanted to post 2 projects that I hope to accomplish this winter in hopes that I actually do finish them. First on my list is this super cute hat from my favorite knitter!

Susan B. Anderson
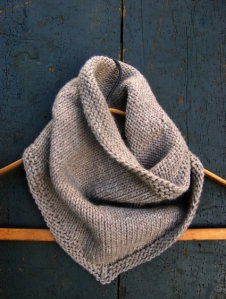
The second is this fun bandana cowl.

Purl Bee Bandana Cowl

I already have the yarn. I picked a brown yarn with hints of gold shimmer in it, which will look great with my brown down coat.

Will she finish? Stay tuned!

Birthday Cake

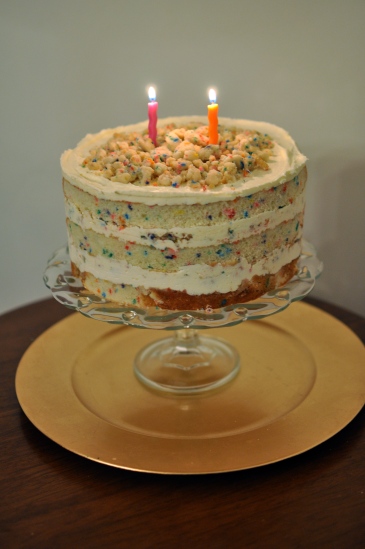
For my birthday, my sister-in-law bought me a cookbook by a popular hipster bakery in New York, Momofuku. After seeing the recipe for Birthday Cake, I knew I had to make it for Eliza’s 2nd birthday. With it’s pretty rainbow sprinkles, loads of frosting, and cookie crumbles, it was the epitome of a birthday cake, and a work of art to boot!

Image

It was very involved, but worth every second!

First, the cookie crumbles (they taste like sugar cookies with a hint of salt) 

Next, the cake batter which you beat and beat and then beat some more until it’s light and fluffy.

Doesn’t it look like a pretty cloud? I think I could eat this cake alone and still be happy.

Next up, the frosting, and finally assembly.

Assembly: bottom layer brushed with milk/vanilla soak, frosting, cookie crumbles, frosting again, repeat.

Finally, frost and top with cookie crumbles and frozen for 12 hours and then thawed for at least 3.

Final step, serve!


I was so pleased with the final result. There is one small slice left for me to savor tomorrow. Unfortunately, the birthday girl was sick all weekend and didn’t love the cake.

That’s ok. More for me 🙂

It’s summer

I haven’t made anything for quite some time.

However, I did see this toddler busy book that looks SO great and doesn’t require a whole lot of sewing, just fusing. However, I noticed on there that she said she used heavyweight felt for some of it and I’m just curious how important that is? She also uses heavyweight non fusible pellon for the pages as she says it holds up better than felt in the long run. Hmmmm.  Thoughts?

http://servingpinklemonade.blogspot.com/2011/01/quiet-book.html

A hat for Evie

I have finished something else! I actually finished it awhile ago, but haven’t had time to write about it.

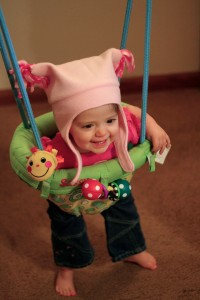
I made this adorable hat for my baby:

Gloria originally made one for her baby girl and let me know where I could find the (free!) pattern online. It’s at Infarrantly Creative, and it was pretty easy to follow except for a moment when she used the word “hats” to describe both the actual finished piece, as well as two of the parts of the piece, which took me a bit to understand. But that’s nothing new for me: I often have to ask my husband to tell me what some instruction means after I’ve read it one thousand times to no avail. (This happens to me at least once per sewing adventure. Probably part of being a newbie.)

Again, it was so satisfying to make something easily that would have cost me ten times as much to buy. It didn’t take me long to make and I used fabric from my stash (which were remnants from JoAnn’s). Score.

Also, there’s supposed to be velcro holding the bottom flaps together under her chin but I kind of like the way they look just flapping around. What do you think? Silly looking? Not warm enough? Lazy of me?

(Isn’t she adorable?)

HUMAN CLOTHING

As I posted on Facebook this morning: I MADE MY FIRST ARTICLE OF CLOTHING. FOR A HUMAN. (because I have made many [ugly] Barbie clothes and the clothes for Juni’s doll)

It’s a skirt for Juni!

I found the free pattern at Grand Revival Designs here after much searching for the perfect skirt pattern. It’s a well-written pattern and pretty easy to follow. (I’d say I’m an advanced beginner.) Not many pictures/diagrams, so that was a little challenging for me (I have a MUCH easier time reading pictures than words for instructions), but I am proud to say that I figured it  out!

At first, I thought it would be too short. But seeing it on Juni, I think this length works.

Next I’m going to make her another one out of some old pink corduroys of mine that don’t fit me anymore. And Gloria, I have a lot of this fabric if you want me to make a matching one for Baby Bee (or you can make it if you’d prefer).

Then, I want to make the art smock from this book:

And then I want to make the market skirt from made.

(I made some clarifications/modifications to the pattern. I don’t know if it’s okay to post them online, but I think I will. Let me know if this is illegal. Download here.)